Showing posts with label Summer Toys. Show all posts

2 in 1 Homemade Water Gun for Summer Water War

Guide for how to make yourself a 2 in 1 Homemade Water Gun, a most exciting DIY toy gun  for your Summer Water War.

Here is how your water gun look like:

2 in 1 Homemade Water Gun


Main materials for the homemade water gun: A ball pen, an empty shampoo bottle with the bump-cap, some small water pipe, a can:

Homemade Water Gun

2 in 1 Homemade Water Gun 1


Details guide for how to make a homemade water gun:

Option 1 ( Mini water gun ):


Homemade Water Toy Gun

Homemade Water Gun 1
1.1 Cut 1 piece from the ball pen inner, stick on some glue, note that do not stick glue to the holes.


Homemade Water Toy Gun 1

2 in 1 Homemade Water Gun 2
1.2 Stick the pen inner to the pen-head, cut away the top to make the barrel.


Homemade Water Gun 2
1.3 Cut a part of the pen outer, insert the barrel made in step 1.2 in.


Homemade Water Toy Gun 4

Homemade Water Gun 3
1.4 On the top op the shampoo's cap, bore a hole which the size that fit the pen inner.


2 in 1 Homemade Water Gun 3
1.5 Insert your water gun barrel in.


Homemade Water Gun 4
You've finished making yourself the 1st option of the homemade water gun. 


Option 2 ( Machine water gun ):

Homemade Water Gun 5
2.1 Release the cap from the shampoo bottle, insert your water pipe in 1 end.


2 in 1 Homemade Water Gun 5
2.2 Bore 2 hole on the can's cap. Insert the left end of the pipe in.


Homemade Water Gun 6
 Here is the 2nd option of your water gun.

Check this clip out for how your 2 in 1 homemade water gun now ready for the summer water war:


Please find here even more Homemade Toy Guns .

DIY Spirit Stoves Camping From Coke Tin Can

On your camping trip, everything should be as neat as possible. So why don't you try this DIY Spirit Stoves Camping From Coke Tin Can. You almost bring no material with for this DIY spirit stove since all you need is 2 empty coke / beer tin can that you've just drunk. Okay, let's check this out.

DIY Spirit Stoves Camping From Coke Tin Can

How to make the DIY Spirit Stoves Camping From Coke / Beer Tin Can:

Step1:

DIY Spirit Stoves Camping

DIY Spirit Stoves From Coke Tin Can

DIY Spirit Stoves Camping From beer Tin Can
Cut 2 coke tin can into 2 bottom parts as the first pic. Make holes in 1 of them like the 2nd pic. Then stick them tide together, you can you a small tin piece to do this easier. In case you want to cook with a grill fire in a long time, put some cotton wool inside before sticking these 2 parts.


Step2:

DIY Spirit Stoves From beer Tin Can

DIY Spirit Stoves Camping From Coke Can
Release the screw, slowly pour some spirit in. After that, fix the screw back, this screw will drive the fire to spread out steadily.
Notice to put your DIY spirit stoves camping from coke tin can on a heatproof surface before setting it on fire.


DIY Spirit Stoves Camping From Coke Tin Can 2

And this is the fire from your DIY Spirit Stoves Camping From Coke / Beer Tin Can, an awesome ideas for your camping trip huh :)

Have 1 nice trip - www.easydiytoys.com

How to make a homemade box kite

Here comes the summer, let’s make the unique kites to play. In this topic, easyDIYtoys.com will show you how to make a homemade box kite, this interesting kite flying in the sky will make everyone impressed :)
How to make a homemade box kite

How to make a homemade box kite:

Guide to make a homemade box kite
(Picture 1) The frame of the kite from bamboo and ropes.
How to make a box kite
(Picture 2) Cover the kite with cloths or papers.
In the basic, a homemade box kite is quite simple to make, only with 2 steps to make the frame and the cover like in the pictures above then you can make yourself one.

Below is the detail guide:

Step 1: Make the frame from bamboo, tie the ropes in every angle like in Pic 1:
Guide for homemade box kite

Step 2: Cover 2 frames with thin cloths or papers.
homemade box kite

How to make a homemade box kite 2
You can also stick the ribbon into the needed point of the frame like this or use the rope to tie the cloths into the frame.

How to make a homemade kite
Tie the flying rope follow Pic 2 then you’ve finish your handmade box kite.

To make a box kite nice and steady, you should cut the lines at the needed points together, so the box kite will keep the shape not tottering.
 
How to make a homemade box kite simple

How to make a homemade box kite 3
You can also saw the cloths together to make the kite more attractive.
Simple homemade box kite

Or you can come up with other idea to make the kite with many floors like this:

How to make a homemade box kite 4

Wish you succeed and have good time with your handmade box kites.

If you want to make an easier kite, then learn more in this topic: How to make a simple homemade kite.

Or else, folding the paper plane to play is also exciting: 12 ways of folding the paper plane.

www.easyDIYtoys.comHow to make a homemade box kite.

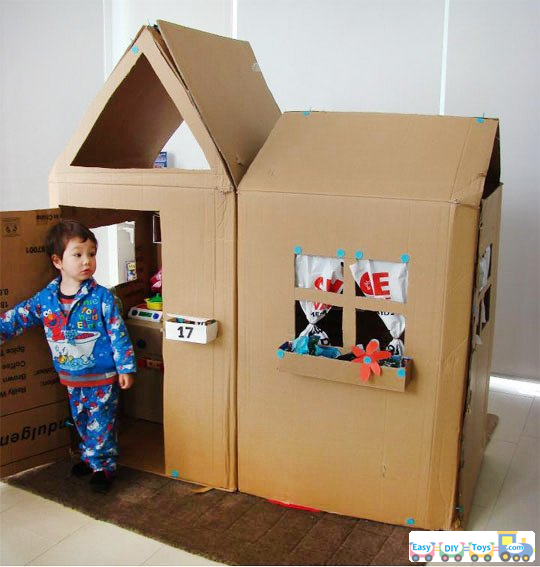
10 Ideas and Details Guides For Homemade Paper Toy Houses

Kids love to have their own space, you can see that they very excited while playing with toy houses, then they seem being live in their own world. So why don't you check out these 10 Ideas and Details Guides For Homemade Paper Toy Houses and make tour own some such these simple homemade toys for your babies.

1/ Homemade paper toy country house, the decoration you may take by your self or ask your kid to do for them to develop their imagination. 
 Homemade paper toy country house


2/ Simple homemade paper toy house decorated by colorful sticking tape
Simple homemade paper toy house


3/ DIY Christmas paper toy houses
DIY Christmas paper toy houses


4/ Bigger homemade paper toy houses with the ability to put some toy furniture inside
homemade paper toy houses ideas


5/ Country toy houses need some homemade paper cages too
guides for homemade paper toy houses


6/ A Homemade paper toy elevator for apartment block
ideas for homemade paper toy houses


7/ Details guides for making homemade paper toy houses, with this simple guides your kids can fold their toy houses tidy after playing.
homemade paper toy houses guides


8/ A quarter with many homemade paper toy houses
simple guides for homemade paper toy houses


9/ Some DIY toy furniture for the paper toy houses
homemade paper toy houses simple ideas


10/ DIY toy kitchen furniture for the homemade paper toy houses
ideas and guides for homemade paper toy houses

Please find out here even more homemade paper kitchen toys

www.easydiytoys.com - 10 Ideas and Details Guides For Homemade Paper Toy Houses.

Simple Homemade Kite For This Summer

Flying kites is a great idea for summer right! And it will be even more great idea to fly a homemade kite that you make it yourself. Don't be afraid, it is very simple to make a DIY kite, just find out below the guide to make a simple homemade kite for this summer.

Simple Homemade Kite For This Summer


Preparing:
  • Bamboo stick
  • Paper or light fabric
  • Glue
  • Thin rope
Guide to make a simple homemade kite:

Step1:  Use a pencil and draw on your paper a lozenge like this picture:

Simple Homemade Kite idea For This Summer


Step2: Cut away at the edge

Simple Homemade Kite DIY
Simple Homemade make yourself


Step3: Try on your bamboo stick according the lozenge's diagonal, measure, the cut, tie them in to this T shape:

Guide Simple Homemade Kite


Step 4: Make holes at 4 corner of your paper, then tie your bamboo tie to the paper.

Summer homemade play idea


Step 5: Tie thin rope like the picture:

Guide to make a simple homemade kite


Step 6: Cut, glue your paper/ fabric in to long ribbon to make the tail for your homemade kite

Idea Simple Homemade Kite playing This Summer

Just some simple step, now you have your own a homemade kite for this summer. Let's go fly!

More homemade kite: Simple Homemade Kite For This Summer

Paper plane is also a great idea for playing in the summer, you must be very excited exploring here many way to fold a paper plane .

www.easyDIYtoys.com - Simple Homemade Kite For This Summer.